
Talos VM on vSphere
Below are the instructions for creating a Talos VM atop a vSphere host for use with TrueCharts.
Creating Talos iso
-
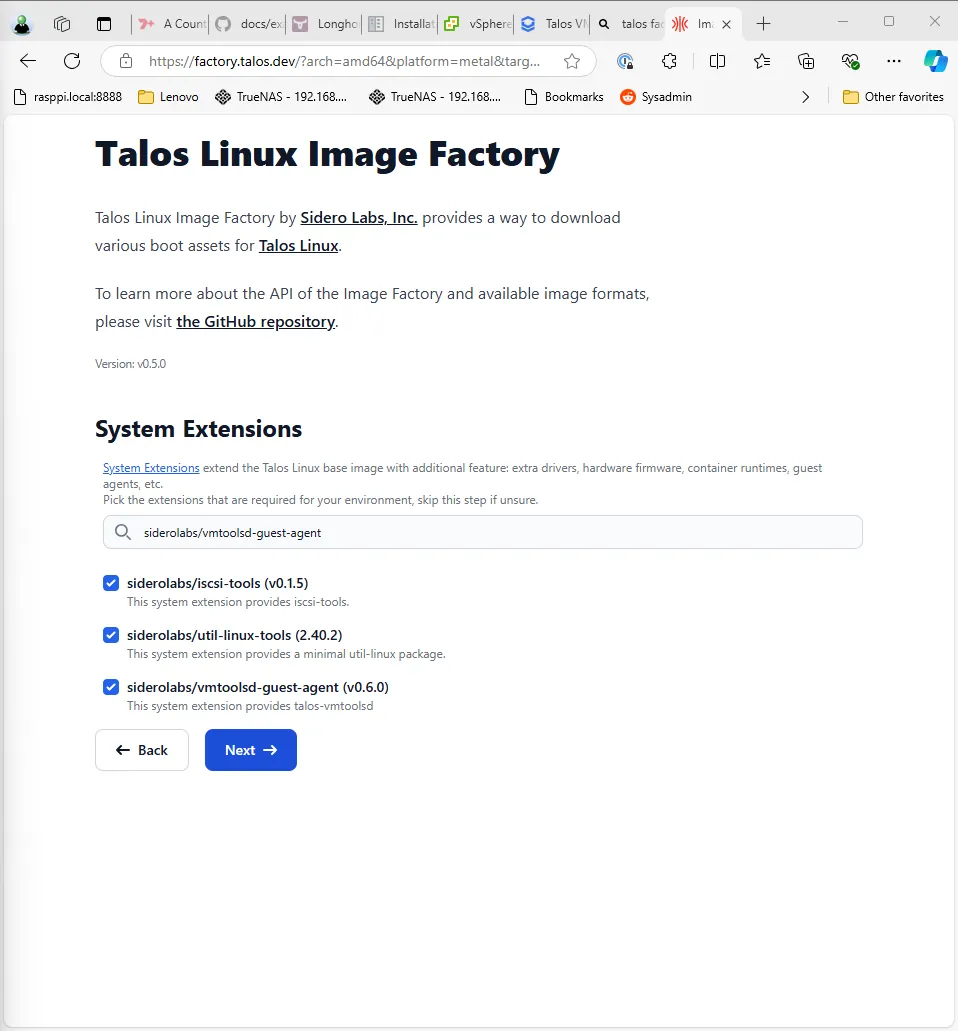
Navigate to https://factory.talos.dev/ in web browser.
-
Hardware Type select
Bare-Metal Machine.. -
Select a Supported Talos version (e.g.
1.8.0). -
Select Machine Architecture amd64.
-
Select System Extensions as follows and then tick the box for each of the following:
siderolabs/isci-tools siderolabs/util-linux-tools siderolabs/vmtoolsd-guest-agent
-
Select next on the Customization screen, keeping the default settings.
-
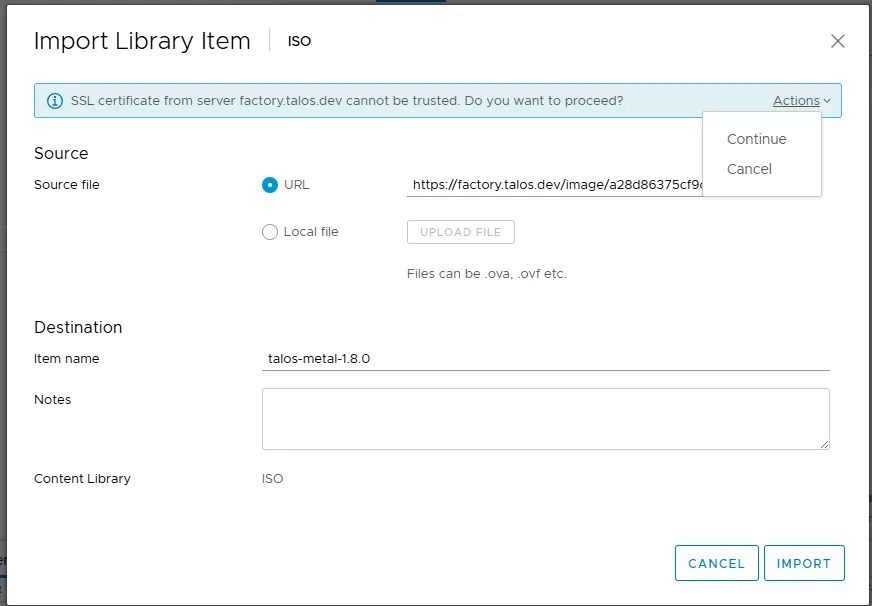
The ISO is now ready, right click on ISO and copy the ISO
URLlink. Retain theURLfor use in the next step.

Downloading Talos
-
Login to vSphere Client, select
Content Libraries, then select a Content Library (e.g.ISO). -
Select
Import itemand then selectURL. -
Paste the
URLfrom theCreating Talos isostep above. -
Provide an Item Name (e.g.
talos-metal-1.8.0) -
Select Actions > Continue on the SSL Certificate prompt for factory.talos.dev
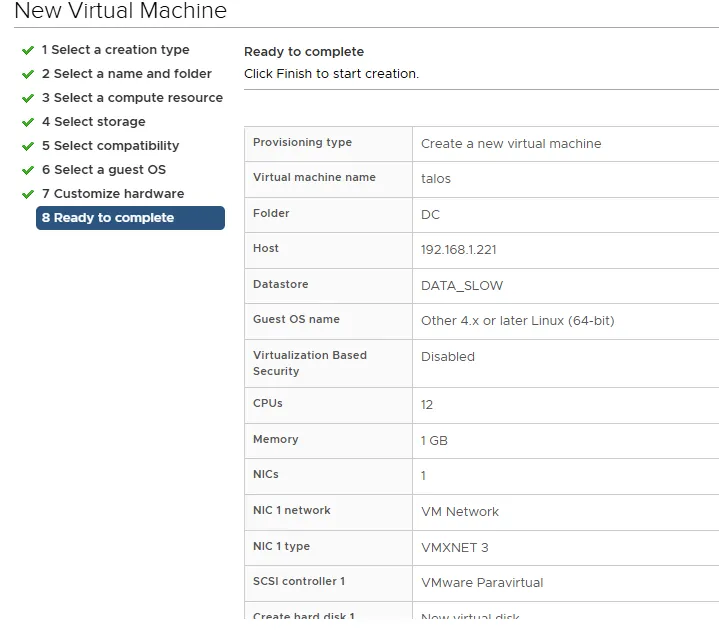
Creating the VM
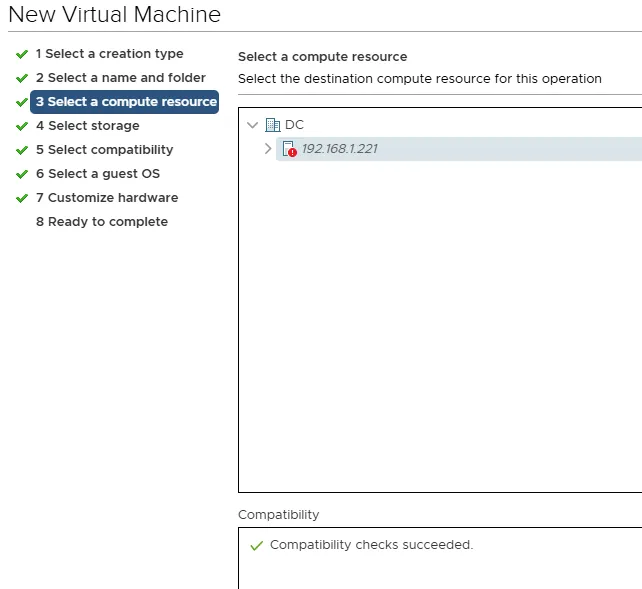
-
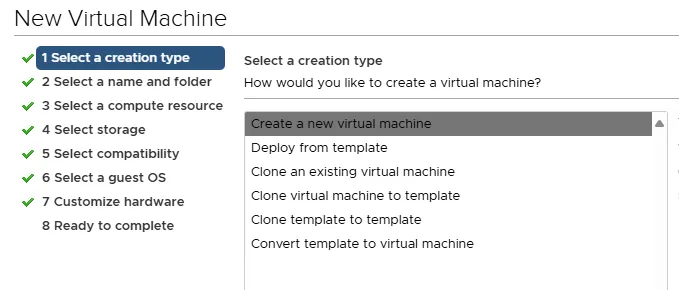
Select
Hosts and Clusters, then select a node. -
Select
Actions, then selectNew Virtual Machine. -
Select
Create a new Virtual Machine.
- Enter a virtual machine name of
talos.
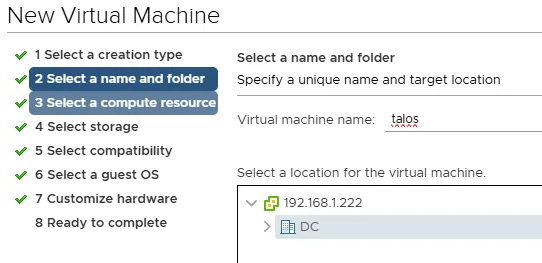
- Select next on compute resource screen.
- Select storage (e.g.
local).

- Select the latest available compatibility level of ESXi depending on version you are running.
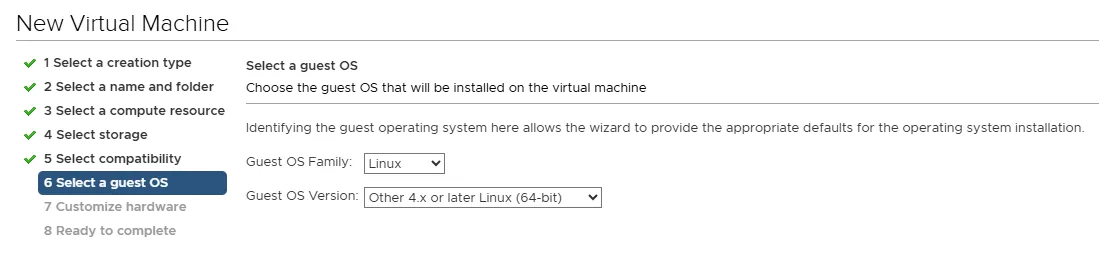
- Select Guest OS Family
Linuxand then Guest OS VersionOther 4.x or later Linux (x64).
-
Select the sockets (e.g. 1) and amount of cores to be one less than the total available processor threads (e.g. if you have a 6 core processor with HyperThreading then there are 12 available threads and the value should be 11.)
-
The minimum memory value should be 16384 and the recommended value is 32768 or more Megabytes
-
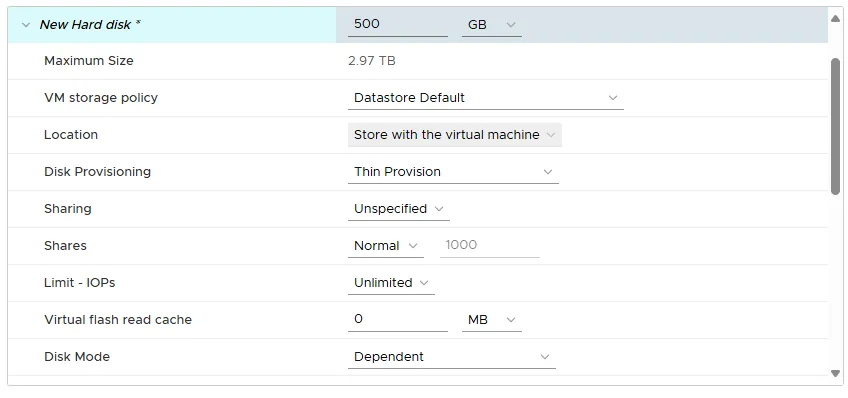
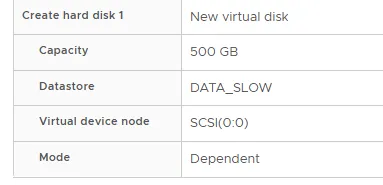
Set the disk size to
500, then select the storage repository (e.g.local).
-
Set the Disk Provisioning to
Thin Provision -
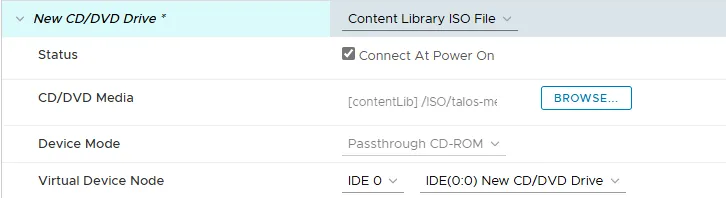
Set the CD/DVD Drive to
Content Library ISO File, then the ISO uploaded earlier.
Update Talos Config
-
Open the
clusters/main/talos/talconfig.yamlfile. -
Find the
systemExtensionssection under controlPlane section. -
Comment out
- siderolabs/qemu-guest-agentwith a#in front. -
Paste
- siderolabs/vmtoolsd-guest-agentabove the previous line, then ensure the tabspacing of the new line matches. -
Repeat steps 2-4 for the worker section.